Popular Posts

Showing posts with label Canning. Show all posts

Friday, June 6, 2014

Grape arbor and Canning Rhubarb


We put in a grape arbor made out of cattle panel last year.  It looks like we will be getting a few grapes this year.  We planted Concord to eat and Green seedless grapes for raisin making. I can't wait to try making raisins since I have never done that before.  Better not get too excited until I know there will be a harvest. Especially since the Mocking birds like to eat every berry we grow and Japanese Beetles love grape leaves.  If fact some gardeners grow grapes as a Japanese beetle trap to keep the pesky little things off their other plants. I posted about Concord grape bars here http://raf6.blogspot.com/2012/09/recipe-for-concord-grape-bars.html.  Too bad its not time for grapes yet, the family loves them.


I canned 13 quarts of rhubarb to eat on yogurt and make into rhubarb sauce for over biscuits.  To make your own just clean the ends and chop it up.  Place in sterilized jars, add 1 tbsp succanat and hot water, place lids on and water bath for 10 minutes to seal.


My mom brought the rhubarb from her garden since I have not been able to get it to grow here.  I think we will try to plant it one more time this fall, hopefully I can get it growing well enough to harvest my own.

So what does rhubarb need to grow?

Rhubarb is a cool season, perennial crop. It requires temperatures below 40 °F to break dormancy and to stimulate spring growth and summer temperatures averaging less than 75 °F for vigorous vegetative growth. Rhubarb plantings remain productive for 8 to 15 years.

 Rhubarb tolerates most soils but grows best on fertile, well-drained soils that are high in organic matter. All perennial weeds should be killed the year before planting. The fields should be cultivated in the spring and after cutting, and hand hoeing may also be necessary. Rhubarb is relatively free of insect and disease problems.

Manure is an extremely valuable source of organic matter as it helps to conserve moisture, preserves the soil structure, and makes nutrients readily available. An application of composted manure or leaves is beneficial in late fall and early winter, but do not cover the crowns as this may promote rotting. Fresh manure should not be used as this will burn the tender rhubarb plants.

Plant rhubarb roots in early spring. Planting seeds is not recommended as it may take too long for the plants to become established, and the seedlings would not come true to color and size, if that is important to you.
Space rhubarb roots 36 inches for plants in smaller gardens (non commercial).

Good luck and Happy planting!


Saturday, July 7, 2012

Tomato canning and Homemade Sauce


We have been picking most of the tomatoes before they are ripe and letting them finish ripening on the back porch.  This is because it has been so hot that the tomatoes that are exposed are cooking on the vine.  I have made two large batches of salsa so now it is time to can some tomatoes.  I used to make sauce and can it but now I can the tomatoes and make the sauce in the cooler months when we are going to use it for spaghetti or lasagna. But I may make a batch of sauce if there are a lot of tomatoes.   It  may be nice to have some to open on the days I am needing a quick meal and I don't have time to cook the tomatoes down.


We used the Cherokee Purple, Heirloom Yellow, Heirloom Beefsteak, and Roma tomatoes in the jars.  Not all the jars were as colorful as this but they still looked yummy.  When the jar is opened and cooked down for sauce you won't see the yellow color at all.

Here is a "run"  all sealed and ready for the pantry.    By the way a "run" is the number of jars that will fit in your canner at a time.  Another helpful hint when you are canning is to put a little vinegar in the water the jars sit in.  This makes it so that your jars come out of the water sparkling instead of with a film on them.

Here is a rough recipe of my spaghetti sauce I like to start it in a crock pot the night before and let the tomatoes cook down.

Raisin' Acres Tomato Sauce

4-5 qts tomatoes
1 large onion chopped
1-2 green peppers chopped
4 cloves garlic minced
2 tsp salt
Italian Seasoning (basil, oregano, rosemary, thyme) Heavier on the basil than the other three ingredients.
**1 tsp fennel seeds~these are very important since they give it a nice, rich flavor
Olive oil
nice size bay leaf

Place tomatoes, salt, fennel, bay leaf,  and olive oil in crock pot.

Saute onion, garlic, and peppers until start to brown then add seasoning, stir and let sit for a few  minutes (sometimes at this point I will add a touch of burgundy to the pan to de-glaze) then put in crock with the tomatoes.  

Cook down, use a hand blended to smooth out and incorporate everything into the sauce.  If I am in a hurry and the sauce isn't thick enough at this time I will add a can or two of tomato paste and adjust seasoning to taste.

Enjoy!

Tuesday, July 3, 2012

Update around here

I am declaring a break from all things food today.  The first question Ian asked this morning was, "What are we canning today Mom?" to which I answered absolutely nothing.  We all need a break!  Times like these make me wonder how our ancestors did it?  How did they can and put up enough for their families for an entire year?  Most old time families were rather large and they literally had to can thousands of jars of food to feed everyone from their pantry.  We are no where close to feeding ourselves from our pantry but I am thankful for what we do have especially with the rising cost of food.  This time of year is nice because there is so much  in the way of fresh fruit and veggies to eat.

I really need to sit down and start planning school for this next year.  The kids will be starting their college classes in August and I need to get books for the couple of classes I will be teaching them.  This is their last year and I am having a struggle.  They are growing up, I want them to, but I want them to stay little and be with me forever.  I hope this makes sense, I am sure it makes sense to others who have experienced their kids growing up and leaving home to start their lives as adults.  They are truly amazing people right now and I am excited to see how God uses them as they spread their wings and fly.

I walked out to the garden this morning and saw that the black beans and the navy beans are turning yellow and will need to be pulled to finish drying before we shuck them out.  The tomatoes need to be picked as well as the blossoms picked off the basil plants so that they will keep growing big and bushy.  I haven't had time yet to make pesto but it is on my list.  There is a recipe in 101 cookbooks.com for pesto the way an old Italian grandmother makes it.  It is done by hand rather than with a food processor.  I would like to try it out.  There is another recipe on the Nourished Kitchen blog for fermented chili sauce that I am going to try as soon a more of my peppers get ripe.


We had a bit of rain yesterday for which we are ever thankful.  It is also much cooler so we will be able enjoy the outdoors a bit today.  The back pasture looks greener this morning from that little bit of rain.  The goats have been out already slurping up some of the grass in the fields.  We have sold all of our bucks except for one and I am hoping to get a nice Lamancha buck to breed with our girls come fall.  I am considering going to once a day milking or drying off one of the goats so that I don't have as much milk to deal with.  I am going to give it a couple of weeks while I consider what would be best for us.


The boys left for the spring this morning to get some more water.  They are going to run water out to the barn/garden area from the water line.  This will be a lot easier as far as closeness to the garden and dealing with a large amount of hose across the yard to trip over.  They also are working on our greenhouse that I hope to have up by fall.  Time sure does fly.  I'm going to enjoy some quiet time to myself so I will sign off for now.

Peaches

I purchased 4 boxes of peaches through our local co-op, planning on canning most of them since we were down to our last couple of jars from last year.  I put a few in the crisper for us to eat and we canned the rest.  It is normally a family affair, when there are so many hands doing the different jobs it is done very quickly.  It is a sticky job and the juice gets everywhere.  The positive side is that the kitchen and floor were cleaned really well when we got done. Should I say that the kitchen floor hasn't been mopped in a while?


The peeps all lined up and helping.  I am so thankful that their hearts are so willing to serve their mamma, otherwise I would have been in the kitchen four times as long.  Each one of them dug right in a did their jobs with gusto.
Paige plunged peaches in hot water, brought them to the cold water in the sink, and filled the jars with honey/cinnamon water.   Connor loves peeling peaches so he peeled almost every one, Ian helped sharpen the knives and cut the peaches in sections, Rachel cut sections and filled jars.  I did a little of everything and everyone pitched in to finish and clean up.


Pheobe even helped out by laying on Paige's skirt and making it impossible for her to move.


When we finished up with the peaches, I made peach pit jelly out of the skins and pits that were left over.  I have never done this but found a recipe and it made sense not to waste the skins and pits.


Friday, June 22, 2012

More Canning

I had a busy day canning yesterday.  We processed chicken, beans, blackberry jelly, and blackberry jam. The jelly being made by special request.  My husband prefers no seeds to get stuck in his teeth.  After making the jelly I noticed that there was so much extra pulp left that I added a bit of spring water and made jam.  It tasted great and the family is enjoying it on PBJ sandwiches and toast.  The thing is I usually have a touch of jam or jelly left when I make it.  The last scrapings from the pot go into a bowl for immediate use.  You do know that the jars of jam that you just made cannot be opened for a few months, right?  Well, maybe that is just what I like to think.


I placed the whole chickens (plus some feet) in the pressure canner with some spring water, touch of salt, bay leaf, garlic, and some Italian seasoning.  Pressure cooked it for 30 minutes and pulled it off the bone.  I then strained the broth to take out any leftover chunks and placed the meat in sterilized wide mouth jars while the broth heated up to boiling.  The I finished filling the jars and processed them in the pressure cooker for 90  minutes at 15lbs of pressure.  Pat bought me a propane burner a few years ago so that I could do some of the canning outside.  Since it has been in the 90s and humid this burner came in real handy.  I had some broth left over so I just canned it along with the other jars.  I did use chicken feet in the initial process because I believe that they give the broth more nutrition and a richer taste.  The bones, skin, and other junk was taken out to the chickens and devoured in 15 minutes flat.


We decided to check the pickles to see if they were done and if they were crispy.  Yeah!! I made a crispy pickle after trying for 20 years.  It was sour, a little spicy from the red pepper flakes, and had good dill flavor.  I didn't want them to ferment anymore so we re-packed them from the crock into smaller jars to put in cold storage.  Washing up the crock brought back memories of my mom and grandma.  The crock I use came from my grandma.  She kept busy in the kitchen right up to the day she passed away in her 80's.  She was always trying new recipes out on us and kept notebooks with recipes, quotes, card, pictures, bible verses, and such in them.  After she passed away and we were going through some of her notebooks it was odd to find little notes that I had written to her when I was a child.


We made a sign to see if we could sell some of the extra produce to people driving by.  I can't label our food as organic because we will not go through the hoops of getting certified paying to maintain that certification.  Since we don't use chemicals and artificial fertilizer's, I figure I can label it naturally grown.  Our neighbor stopped by to chat and we were able to give him some veggie's as well as some friends that live up the road from us.


This is a picture of the cheese that I have been making this year.  It doesn't include the wheel of cheese that I took to a friends house or the wheel that is in the refrigerator soaking in blueberry wine.  It also doesn't include the 3 batches of feta and 4 batches of soft herbed cheese I have made so far.  I just poured 3 gallons of milk in the cheese pot this morning to make another Tomme today.  I sure hope all this cheese turns out yummy or I will have spent countless hours making it just for it to be chicken food.  That is the thing with hard cheeses, you have to wait (patiently) at least 3 months while they age before you can try them.  We will let you know when the time comes for the taste test.

Saturday, June 16, 2012

Chokecherries, Pickles, Beans, and the Goodness of God

I have been eye-balling the chokecherry trees all year hoping they would produce some fruit for chokecherry jelly.  I noticed that they were ripe about a week ago but have been busy picking blackberries, cukes, beans, and squash.  I finally had a couple of minutes to scoot out and pick enough for a batch of jelly.  I make one batch a year if I can because only two people in our family like it. 


The jelly is delicious on hot biscuits. The taste is kind of sweet with a tart aftertaste.  Chokecherries are also high in vitamin C.  If you want harvest chokecherries, you have to beat the wild animals to them.  Birds love them and will strip a tree in no time.  Lucky for us there are 4-5 trees along our pasture and two of them really produced a good crop this year.  You know the adage about the grass being greener?  I was able to pick plenty of berries but really wanted to pick all the "really nice" ones at the top of the tree.  Short of a 15 foot ladder that wasn't going to happen so I had to be happy with a picture of the nice fruit.


Here are the chokecherries I picked.  They were placed in the sink, washed, and the pink berries pulled out.  I cooked them in a pot until the were tender and put them through a Foley food mill.  The juice was then put through cheesecloth overnight without squeezing it.  I then added honey, low sugar pectin mix, cooked, and ladled into small jelly jars. The jars were then water bath canned for 10 minutes to seal.


My daughter came home from her grandparents and helped me pick beans, unfortunately she picked the black beans we planted for dry beans.  I say unfortunately but it really was no big deal since there are plenty of beans coming and we could can them for winter.  So we put up some beans.................. Grandma also sent some rhubarb from NY so while we were doing the beans it seemed like a good idea to pick what rhubarb we had in the garden and can a few jars for winter as well. 


This is so simple, clean and cut the rhubarb into small pieces, place in a large bowl and cover with 1-2 cups sugar to draw out the juices.  Let sit for 4 hours then put in a pot and cook until tender.  Place in sterilized jars and seal in hot water bath for 12 minutes.


Here picture of the corn that was blown down in the storm a few weeks ago. My son is standing by it and he is over 6 feet tall.  God did answer our prayers and hopefully we will enjoy some corn this year..

Sunday, June 3, 2012

Leftover oranges and marmalade

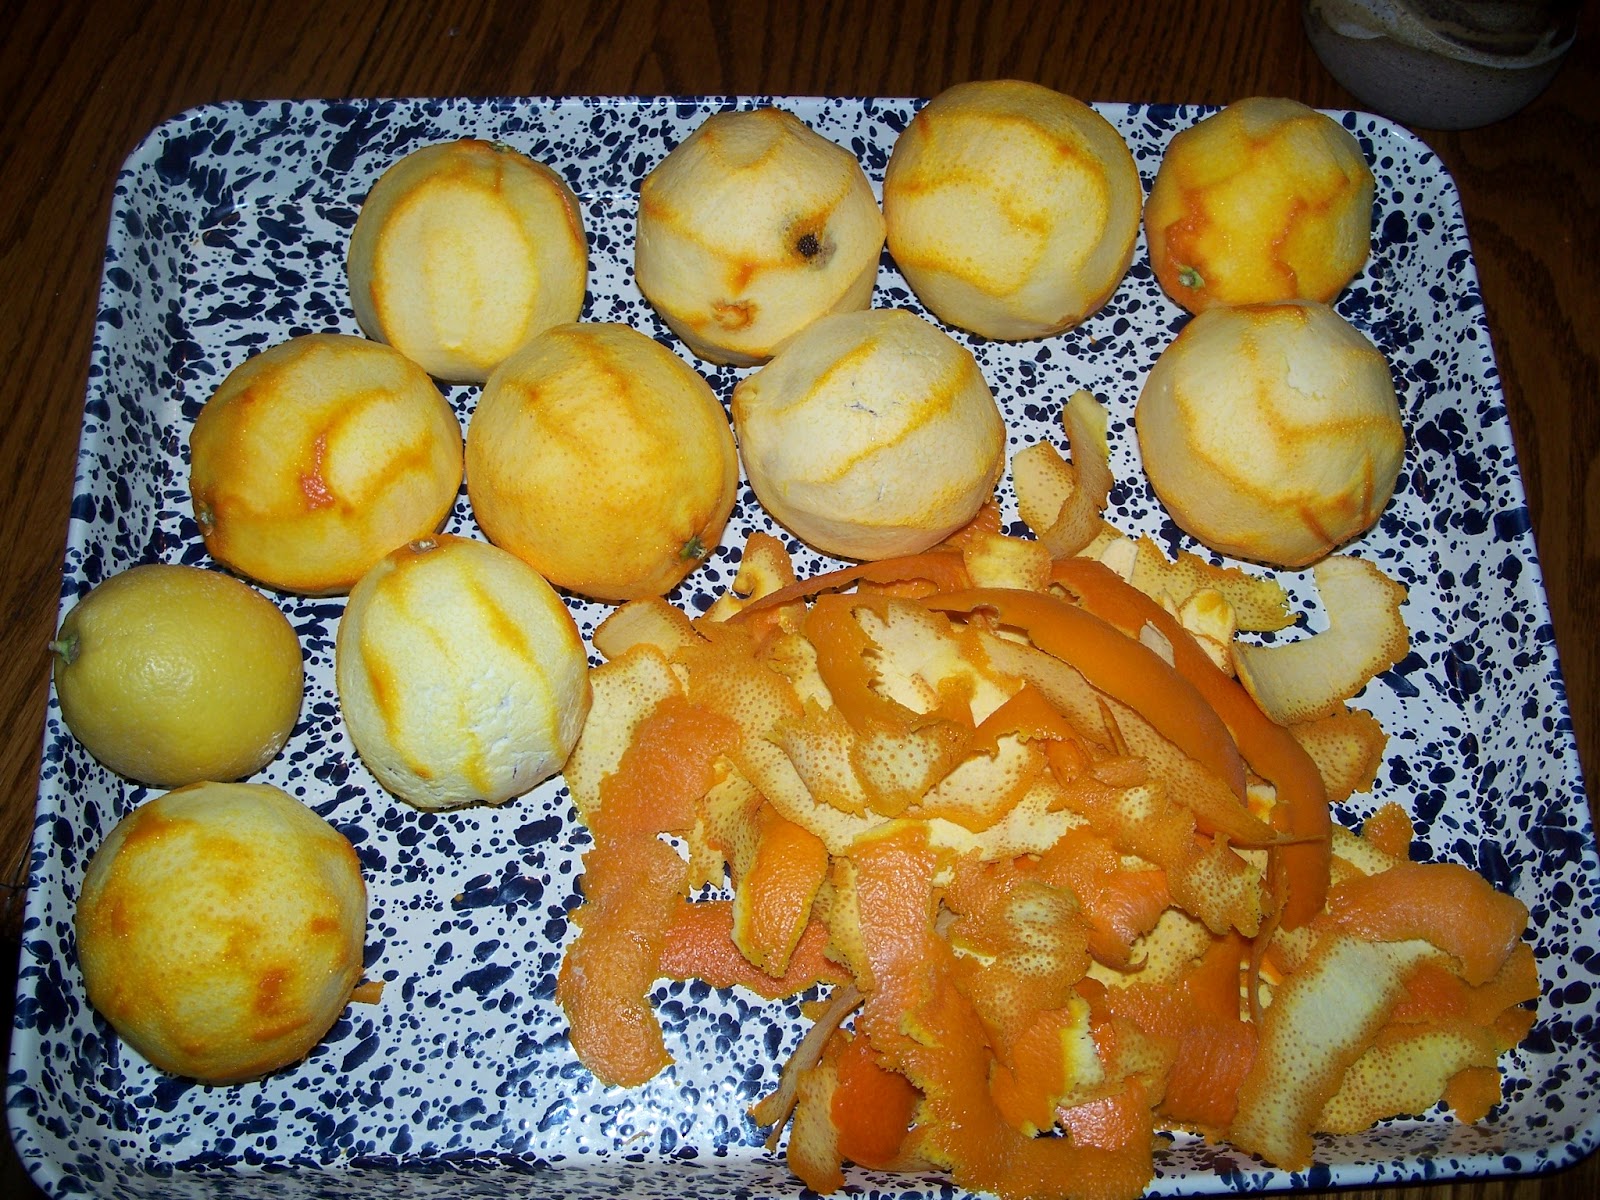
I have never made and my children have never eaten marmalade.  In fact they asked me what it was when I told them I was going to make marmalade out of the leftover oranges we had in the refrigerator.  I don't like for food to go to waste and since the chickens and goats don't eat citrus, I wanted to come up with a way to use the oranges.  I had a moment of inspiration and thought of marmalade and decided that it was high time we tried it.


Orange marmalade isn't hard to make but does take two days.  You have to wash and peel the rinds.  Cut the rinds into thin strips, peel the pith off the outside of the oranges, cut the ends off the oranges, cut in half, and cut into thin sections.
All the oranges and peels are put in a large bowl with some spring water to sit overnight or 24 hours.  This is supposed to help with any bitterness from the pith and peel.  I should probably add that the recipe I used called for 2 lemons with their peels as well.
The next day the oranges and water are weighed and the same amount of sugar in weight is added to the oranges before they are cooked down. 

 My batch of marmalade took 3 hours to cook to the consistency that I wanted for jarring it up.  I also put a few cinnamon sticks in the oranges while cooking because we like the taste.  The cinnamon made the final product darker than what you see in the store.  We tried some on toast and liked it....although it is very sweet.  Last thing, I did was to water bath the jars for 10 minutes to seal them.

Friday, June 1, 2012

My favorite food preservation books

These two books are a virtual treasure trove of information on stocking up or preserving anything from dairy, to produce, to meat.  The book on the right is really nice because the recipes come from the French countryside where the old ways are still being used for preservation.  Believe it or not food wasn't always preserved via the canning jar and hot water bath or pressure cooker.   This book has many recipes that are based on fermentation, ground preservation, Salt brining, etc.  I like this book and the recipes because I don't have to waste energy and time preserving our food.  Not to mention they taste good.  We have not tried all the recipes in this book but are working toward trying most of them once just to see if we like the end product.

Talking about the family liking the end product...... if you spend a lot of time preserving food and the family won't eat the food, you have wasted a lot of time, energy, and money.  I learned a few years ago that I needed to have test batches of food in order to prevent this.  I will make a recipe and have a taste test to see if it is a thumbs up or a thumbs down then I will proceed to making more or crossing off the recipe.

The book on the left called Stocking Up is a huge resource for anyone wanting to produce their own food and preserve it.  It has veggies, fruit, fish and meat, dairy, and nuts, seed, and grain techniques.  It has canning, drying, underground storage, curing, cheese making, and how to cut meat.  There are all kinds of recipes and diagrams that explain building, canning, and so much more.  This book would be in my suitcase wherever I was to move.

You may ask why preserving food and learning to grow our food is so important to our family.  There are many reasons but a couple would be that we know what we are eating if we grow it and feed it.  We cannot afford to buy completely organic foods and this helps tremendously with our budget and with our health.  I believe that we are going to be entering a time where we are going to have to support ourselves (maybe only partially) by eating off our land and the more we learn every year as we try new things, the better off we will be in a situation where we may have to grow our own food to live.  The last reason is that it has been a fun experience and rewarding to see and eat the fruits of our labor.

Tuesday, May 29, 2012

Blackberries


The blackberries in the blackberry patch beside our pasture arw starting to ripen.  I have big plans for them.  I have waited a year to harvest these black beauties.  We had a few last year but they were about done when we moved in.  I thought I had another week or two until they would be ready but, surprise they are ripe.   After chores Monday morning we changed into our berry clothes, gathered our buckets and went out to do battle with the brambles in order to get to the juicy fruit.


If you have ever picked blackberries you know that in order to pick effectively you really need to put jeans, shoes, and a long sleeve shirt on. It was so warm on Monday that we attempted to pick in short sleeves.  We have battle wounds to show our foolishness.  While picking the silence was broken by victims being poked, scratched, and otherwise abused.  Not to mention Squeak, our barn cat deciding to help.  His idea of help was to hide inside the brambles and attack unsuspecting berry pickers, making them squeal with surprise.  While we were out there our four Lamancha bucklings found a cranny in the fence to squeeze through and join us. They would jump and run every time the dog came out of the bushes while hunting for a mouse to eat.  It was quite an interesting menagerie.


We picked about 7 pounds of berries, there are many more to ripen so I see a lot of berries in our future.  The family will want a shortcake first, then I can get down to business and make some jam.  I am also going to can some this year.   I have read that this is a really good way to store them for winter use.  My mom told me that her mother would can blackberries every year. 
I found a recipe that is lower in sugar and has natural pectin from apples in a book called "Preserving Food without Freezing or Canning"  I really like this book and the premise of preserving food without electricity usage and lower sugar. 


Blackberry Jam


2lbs Blackberries
2/3lb diced apples (tart like Pippin)
1 1/2 lb sugar
1/3- 1/2 cup lemon juice
1/2 c. ground Hazelnuts
canning jars and lids


Combine apples,blackberries, sugar, and lemon juice, and let sit overnight in a cool place.  Scald jars and lids well and let drain.  Bring blackberry mixture to a boil and cook on high  heat for 15 minutes adding hazelnuts after first ten minutes.

Fill jars to the rim with the hot jam and screw the lids on tightly.  Immediately turn the jars upside down.  If jars are properly full, very little air should remain at the top.  Store upside down in a cool, dark place.

I haven't tried this yet but am planning on it this year.

Saturday, May 19, 2012

Harvesting Beets

 What a surprise, I went out to hand pick cabbage moth caterpillars off the broccoli and cabbage and found out that some of the beets were ready to be picked.  So there is no time like the present right?  We went ahead and picked the beets and washed them with the garden hose.
Then we cut the tops off, leaving about 2 inches above each beet and separated the beet greens from the beets.  There were a couple of small beets that were picked by accident.  These we put in the beet green bowl.  My mouth was watering just thinking   about having the greens for dinner.


We brought the bowls in and washed the beets again and then put them back into the pot with warm water just covering them.  We boiled them about 20 minutes to get the skins soft enough to come off.  Meanwhile we washed the greens really well and cut half of them up in a bowl for dinner and half of them went in a bag for dinner in a couple of days.

After the beets were done boiling, they were peeled, sliced, and placed in quart jars that were sterilized.  In the quart jars I also put some onion.  After they were filled with the beets, I covered them with a vinegar solution and sealed the jars.  They will taste good this winter.  


The greens were cooked in a large pan with a little coconut oil, salt, and garlic scape's.  They were mighty tasty with a little bit of apple cider vinegar on them.