Popular Posts

Showing posts with label Fruit. Show all posts

Thursday, August 21, 2014

Harvesting and drying rose hips

Rose hip

  • The rose hip, also known as rose haw or rose hep, is the fruit of the rose plant, that typically is red-to-orange, but ranges from dark purple to black in some species. Rose hips begin to form after successful pollination of flowers in spring or early summer, and ripen in late summer through autumn.


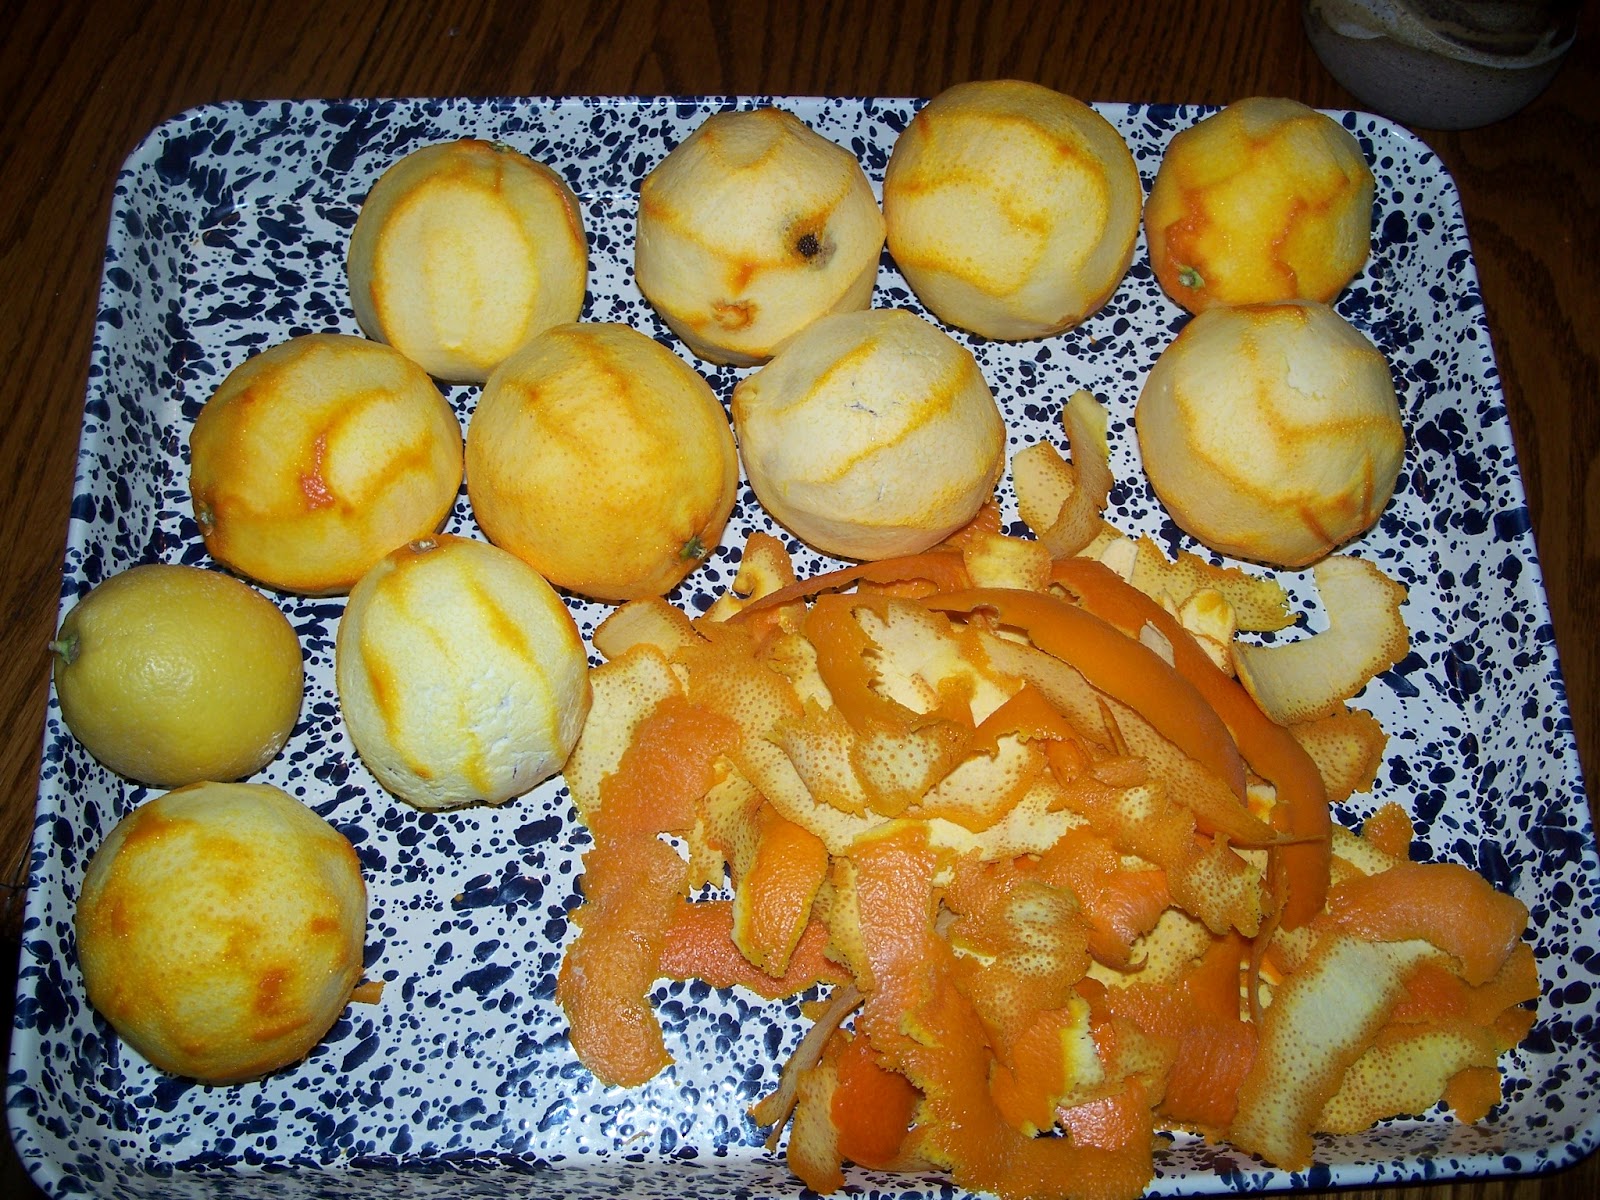
I picked the rose hips off our Rosa Rugosa bushes.  Truth is your supposed to wait until the first frost.  Rumor is that the frost makes them softer and sweeter.  Our rose hips were getting soft and some of them were starting to rot on the bush so I made a command decision and we picked them.

Bet you didn't know that picking them is the easy part, did you?  After you get them picked, you get to cut them open and take all the seeds out.  Did you know that rose hips have a TON of TINY seeds in them?  That little fact has been hammered home since it took FOREVER to de-seed them.  I was tempted to grumble but couldn't help but think of how high in vitamin C and how good they are in tea and how much I wanted to try out making rose hip seed oil.

What is the big deal you ask? Rose hip seed oil is full of vitamins, antioxidants and essential fatty acids that are known to correct dark spots and hydrate dry, itchy skin, all while reducing scars and fine lines.

I want to make some to try in our Rose Creme among other things. The actual rose hip seed oil on the market comes from wild roses that grow in Chile.  I'm telling myself that our rose hip seeds are just as good.  If they aren't they have to be close, right?  Next time you see me and my skin is glowing you will know why ;-)

BTW, I put the seeds in a jar with grapeseed oil and placed them in the sun to infuse.

Do you have any experiences with harvesting rose hips or making rose hip seed oil?  Any tips?

Friday, August 15, 2014

All about Elderberry

Elderberry is good to have on the homestead and it is easy to grow, so it you have a spot and use elderberries or would like to, don't worry.  You can do it!

In my opinion elderberries and the flowers are good to have for flu season.  I try to have dried or frozen elderberries on hand at all times to make elderberry syrup with.  I prefer to use frozen elderberries, it seems like the syrup made from it has more elderberry flavor.  In my mind more flavor means more of the good stuff.

I have an older post on making Elderberry and Astragalus syrup here http://raf6.blogspot.com/2012/11/flu-season-and-elderberry-astragalus.html if you would like to make some for your family.  Elderberries are also used to make pie, jelly, and wine.

There are many types of Elderberries, some of them are for ornamental purposes.  If your goal is to produce berries you should stick with Adams, John's, Nova, or York.  Even though some shrubs are self-fruitful they do produce better when planted with another variety so always plant two different kinds.

This website "Edible Landscaping by Charlie Nardozzi" has good information on elderberries and their planting and care.  You can find the website here http://www.garden.org/ediblelandscaping/?page=july_elderberry.  The following is taken from that site.

 Types of Elderberries

  • 'Adams' - This American variety grows 8 to 10 feet tall. The large, juicy, dark purple fruits ripen in August and are great for making pies. The strong branches hold the berries upright. Plant a pollinator variety such as 'Johns' for maximum fruiting. This variety is often sold as 'Adams No. 1' or 'Adams No. 2'. There is little difference between these two selections.
  • 'Black Beauty' - This striking European variety features purple foliage and lemon-scented pink flowers. It grows 6 to 8 feet tall and wide and can be grown in perennial borders or as a foundation plant.
  • 'Black Lace' - This eye-catching European selection looks like a Japanese maple with its dark purple, deeply cut foliage. Like 'Black Beauty', this variety also grows 6 to 8 feet tall and wide, producing pink flowers and dark purple fruits.
  • Johns' - This early-producing American variety produces an abundance of berries that are especially good for making jelly. Growing 12 feet tall and wide, this variety is a good pollinator for 'Adams'.
  • 'Nova' - This American variety can be self-fruitful, but does best with another American elderberry growing nearby. Large, sweet fruit are produced on compact, 6-foot shrub.
  • Variegated' - This European variety has attractive green and white leaves and grows 6 to 8 feet tall and wide. The plant is less vigorous and productive than other elderberry varieties, but the foliage is attractive all season long.
  • 'York' - This American variety produces the largest berries of all the elderberry selections. It matures in late August and only grows 6 feet tall and wide. It pollinates 'Nova' well.


 Our Adam's and York bushes will be three years old this fall and are producing more berries than our family will use this winter.  I have frozen over 2 gallons of berries so far and there are more to pick.  The York bush produces huge umbrells of big, juicy berries. The Adams produces smaller umbrells but is very prolific and is about 7 ft by 9 ft. (That is with me cutting it back this spring.) We let the shrub produce suckers but you can cut them back and shape the bush if you want.

If you plant bushes this fall you should be able to harvest a few come next summer.  Birds like them so you will have to beat the birds to them. One more thing about Elderberries, they are kind of brittle so if you are picking berries don't try to bend a limb down to get the berries or you will end up breaking it off.  We learned that the hard way. Happy planting, happy picking, happy syrup making.


Saturday, November 10, 2012

Strawberries in November


Ok, I am easily excitable, I admit it.  But I have never picked strawberries in November and if I had I wouldn't expect to pick this many with many more green ones to come.  Now if only the frost will hold off long enough for me to harvest a few more.

I was out gathering eggs, enjoying the sunshine and decided to check the strawberry patch because we have been getting a few strawberries here and there through the fall.  I guess it has been a little while since anyone has checked.  What a nice surprise to brighten an already beautiful day. Can you say yummy, fresh strawberry smoothie?


Thursday, September 27, 2012

Recipe for Concord Grape bars

Grapevine : Mature grapes in the vineyard

I had to re-arrange the house to find my recipe for these yummy treats.  I was thankful that I finally found it since my search on the internet turned up grape bars using grape jelly and jam.  I'm sure these are good but nowhere near the same.  


You will need a 9x13 cake pan for these.
Preheat oven to 400 degrees ferenheit

Pick out about 1 quart of grapes and wash them well.  In a 2 qt. sauce pan slip the skins off the grapes and place the inside and the skin in the pan together.  Heat the grapes, skins, and seeds up intil they are a thin consistency.  At this point I use my hand blender and blend everything together until the skins are part of the sauce.  After mixing together strain the seeds out of the sauce and place the sauce back into the pan and add:


1cup sugar (I use succanat)
1/2 c flour
1/2 tsp salt
1/2 tsp cinnamon
1/4tsp cardamom

Cook this until thickened and add:

2 Tbsp lemon juice
1 1/2 tbsp butter-I don't add this

Stir in well.


In a mixing bowl add:

2 cups flour
1c brown sugar (succanat)
1tsp salt
1/2tsp b. soda
2 1/2 c rolled oats (I like to use 7 grain)
1Tbsp cinnamon

  • Mix this together and flake in 1 cup butter just until crumbly.  Add 1/2 of this mixture to the cake pan and press it down into the pan.
  • Pour the grape sauce on the middle layer and add the rest of the flour mixture to the top pressing t down into the sauce.
  • Place in oven and cook about 20 minutes until brown and bubbly.
  • Let cool and enjoy with a scoop of vanilla ice cream

Let me know if  you try these and how they turn out. 

Wednesday, September 26, 2012

Concord Grape Time


It is time to eat grapes, make pie, jam, jelly, and most of all grape bars!  I grew up eating concord grapes every fall since we were in the Finger Lakes Region where there are a ton of vineyards and wineries.  Concords are a slip-skin type of grape that has a very distinctive taste.  To me, there is nothing like it.  Before we moved, the kids and I would take a day off school to go to the lake and get  a couple of pecks of grapes.  On the drive we would enjoy the fall scenery and nice fresh breezes coming off the lake.  It truly is a breathtaking drive with the leaves coloring up for fall and the neat vineyards on the slopes of the lake.  We could hardly wait to get home and start consuming the juicy, fragrant morsels in our baskets.
I wasn't able to find any Concords last year but this year our co-op offered them.  I couldn't resist, so now we have grapes and it takes me back to those fall drives.  
Grapes will store for a long time if handled correctly and stored in a cool place.  We promptly pulled went through the bunches separating the old "yucky" grapes and the split grapes from them.  The old grapes went in the compost and the split grapes went in a pan to be washed and made into grape sauce.  The later being used to make the most highly prized dessert......grape bars.  Once we had the grapes free of old and split grapes they went into the crisper for eating and making into good food.

I will be posting a recipe for the grape bars in a day or two.


Friday, August 3, 2012

Picking Pears


The pears were ready to pick so we picked them (the kids did most of the work) before it got too hot.  I was smiling the whole time thinking about how we beat the white-faced hornets to them, not to mention the opossums that were visiting the tree on a nightly basis.


Our tree is a standard pear tree and is very tall.  I wanted every single pear on the tree but there was no way to get all the pears on the top branches.  Of course the ones we weren't able to get are the ones that look the biggest and juiciest of all....oh well.  I will have to settle for the 2 1/2 bushels we did get.


Sometimes (well, most of the time) farm work is not very glamorous.  It can be hot, sweaty, muscle aching, and back-breaking work.  It is also rewarding to some people but not to all people.  For the most part, we like being able to tend and put up the food that we grow but occasionally a wistful thought crosses my mind. What would it be like to drop everything and head out to the beach for a week and not worry about animals being fed and milked?  Then I remind myself that it would be a temporary gratification that only lasted as long as the vacation whereas the animals and garden bring gratification that is a lot more long lasting.  Especially in the winter when you pull out the fruits of our labor and enjoy a satisfying treat that you grew, harvested, and put up with you own hands.


So I guess I had better go check the pears and see if they are ready to be made into Spiced Pears, Canned Pears, and Pear Sauce.


Tuesday, July 17, 2012

Preserving Lemons and Making Whey lemonade

I ordered 10 lbs of organic lemons form Azure Standard this month since I wanted to preserve some to use this winter and make some fermented lemonade from a recipe I found.

Preserving them is so easy and smells so nice, not to mention they look really bright and sunny in the jars sitting on the shelf in my pantry.  There are a million sites on the Internet showing you how to do it but at the risk of being redundant I am going talk about how I did it and add some pictures.

You need to sterilize a jar and lid, sharpen a knife, wash the lemons, and get your salt and cutting board out.

I sliced some of the lemons for one jar and cut some of them into quarters for another jar.  So basically you slice them (taking seeds out is optional) ans layer them in the jar with salt in the layers.  As you layer them you press down and work the juices out of them all the way to the top of the jar.  You need to make sure you have enough juice to cover the lemons when you are done.  Don't worry if the juice doesn't cover them immediately, the salt will draw out the juice and within 24 hours it should cover the lemons. 

After I was done preserving the lemons I cut a few up with their juice in a half gallon jar, added spring water, 1/2 c sugar and 2 tablespoons of whey.  I'm not too worried about the sugar because some of it will be "eaten" in the fermentation process.  The jars of preserved lemons and lemonade were then place on the counter for a couple of days.  You need to shake them a couple of times a day.  I also pressed down on the lemons in the jars to get a good amount of juice above the rinds. 

After a couple of days I pressed the preserved lemons down one more time, covered the juice in the jars with a layer of olive oil, put the lid on tight, and placed the jars in the pantry.  When you use preserved lemons, you use the peel not he pulp.  The lemonade went into the refrigerator and was really refreshing with our dinner.

Tuesday, July 10, 2012

Pear Promise


This is a picture of the pear tree a month or so ago.  The tree itself is probably at least 15 feet high and has quite a few pears getting ripe on it.  This spring we cut down a maple tree that was planted too close to it to help it get more sunshine.  It was hard cutting that maple tree down but we knew it would eventually shade the pear so that it wouldn't bear any more fruit.

This isn't the best picture but you can see the pear tree to the left of the basket ball hoop.

It is getting close to harvest time now.  Last year I was able to harvest some but we had to fight the bees for what we did get.  We ate a couple and made pear butter out of the rest.  I didn't realize that they were an early ripening variety last year but now that I know, we are hoping to beat the bees to them and get a little better harvest.  Check back for my pear butter recipe....coming soon!

Tuesday, July 3, 2012

Peaches

I purchased 4 boxes of peaches through our local co-op, planning on canning most of them since we were down to our last couple of jars from last year.  I put a few in the crisper for us to eat and we canned the rest.  It is normally a family affair, when there are so many hands doing the different jobs it is done very quickly.  It is a sticky job and the juice gets everywhere.  The positive side is that the kitchen and floor were cleaned really well when we got done. Should I say that the kitchen floor hasn't been mopped in a while?


The peeps all lined up and helping.  I am so thankful that their hearts are so willing to serve their mamma, otherwise I would have been in the kitchen four times as long.  Each one of them dug right in a did their jobs with gusto.
Paige plunged peaches in hot water, brought them to the cold water in the sink, and filled the jars with honey/cinnamon water.   Connor loves peeling peaches so he peeled almost every one, Ian helped sharpen the knives and cut the peaches in sections, Rachel cut sections and filled jars.  I did a little of everything and everyone pitched in to finish and clean up.


Pheobe even helped out by laying on Paige's skirt and making it impossible for her to move.


When we finished up with the peaches, I made peach pit jelly out of the skins and pits that were left over.  I have never done this but found a recipe and it made sense not to waste the skins and pits.


Friday, June 22, 2012

Cherries

We used to pick cherries around the 4th of July every year......before we moved.  It was the annual family outing where we packed a lunch, went and picked both sour and sweet cherries, then stopped in the park on the way home to have a picnic together.  Of course once we were refreshed from the picnic and settled in at home we all gathered in the kitchen to pit the sour cherries.  Sour cherries are the best for cherry pie, In my opinion of course.  I would try to have enough in the freezer to make 6 pies of so for the winter.  We have not found an orchard near us to pick and I am sad that this tradition is no more.  We are however, forging new traditions as we learn about this area and all it has to offer.


Saturday, June 16, 2012

Chokecherries, Pickles, Beans, and the Goodness of God

I have been eye-balling the chokecherry trees all year hoping they would produce some fruit for chokecherry jelly.  I noticed that they were ripe about a week ago but have been busy picking blackberries, cukes, beans, and squash.  I finally had a couple of minutes to scoot out and pick enough for a batch of jelly.  I make one batch a year if I can because only two people in our family like it. 


The jelly is delicious on hot biscuits. The taste is kind of sweet with a tart aftertaste.  Chokecherries are also high in vitamin C.  If you want harvest chokecherries, you have to beat the wild animals to them.  Birds love them and will strip a tree in no time.  Lucky for us there are 4-5 trees along our pasture and two of them really produced a good crop this year.  You know the adage about the grass being greener?  I was able to pick plenty of berries but really wanted to pick all the "really nice" ones at the top of the tree.  Short of a 15 foot ladder that wasn't going to happen so I had to be happy with a picture of the nice fruit.


Here are the chokecherries I picked.  They were placed in the sink, washed, and the pink berries pulled out.  I cooked them in a pot until the were tender and put them through a Foley food mill.  The juice was then put through cheesecloth overnight without squeezing it.  I then added honey, low sugar pectin mix, cooked, and ladled into small jelly jars. The jars were then water bath canned for 10 minutes to seal.


My daughter came home from her grandparents and helped me pick beans, unfortunately she picked the black beans we planted for dry beans.  I say unfortunately but it really was no big deal since there are plenty of beans coming and we could can them for winter.  So we put up some beans.................. Grandma also sent some rhubarb from NY so while we were doing the beans it seemed like a good idea to pick what rhubarb we had in the garden and can a few jars for winter as well. 


This is so simple, clean and cut the rhubarb into small pieces, place in a large bowl and cover with 1-2 cups sugar to draw out the juices.  Let sit for 4 hours then put in a pot and cook until tender.  Place in sterilized jars and seal in hot water bath for 12 minutes.


Here picture of the corn that was blown down in the storm a few weeks ago. My son is standing by it and he is over 6 feet tall.  God did answer our prayers and hopefully we will enjoy some corn this year..

Sunday, June 3, 2012

Leftover oranges and marmalade

I have never made and my children have never eaten marmalade.  In fact they asked me what it was when I told them I was going to make marmalade out of the leftover oranges we had in the refrigerator.  I don't like for food to go to waste and since the chickens and goats don't eat citrus, I wanted to come up with a way to use the oranges.  I had a moment of inspiration and thought of marmalade and decided that it was high time we tried it.


Orange marmalade isn't hard to make but does take two days.  You have to wash and peel the rinds.  Cut the rinds into thin strips, peel the pith off the outside of the oranges, cut the ends off the oranges, cut in half, and cut into thin sections.
All the oranges and peels are put in a large bowl with some spring water to sit overnight or 24 hours.  This is supposed to help with any bitterness from the pith and peel.  I should probably add that the recipe I used called for 2 lemons with their peels as well.
The next day the oranges and water are weighed and the same amount of sugar in weight is added to the oranges before they are cooked down. 

 My batch of marmalade took 3 hours to cook to the consistency that I wanted for jarring it up.  I also put a few cinnamon sticks in the oranges while cooking because we like the taste.  The cinnamon made the final product darker than what you see in the store.  We tried some on toast and liked it....although it is very sweet.  Last thing, I did was to water bath the jars for 10 minutes to seal them.

Preserving Peaches and Blackberries in Brandy

We purchased a case of cling peaches from our co-op about a week ago. They were just for eating since they are hard to can when the pits don't come out well.  I guess I was anxious for the taste of peaches and couldn't wait for the freestone variety that is easy to can.  The family put a good dent in the case (some family members who will go un-named eating 5-7 peaches a day) but weren't able to finish it before everyone was tired of peaches. At that point the peaches themselves were very ripe.  I had read about preserving fruit in  alcohol, so I decided to try it with the peaches and some of the blackberries we have been picking.


Since we had Ginger Brandy in the pantry I decided to use that.  Using a gallon "pickle" jug, I put blackberries in the bottom of the jar.  With help from the kids we got the peaches skinned and cut up into the jar.  I packed them tight and poured the brandy until it covered the fruit. The jar is now sitting on top of my refrigerator in the basement. I figure that around Christmas we can open it up and sample the brandied fruit.


I think this will be very good in a cake or muffins and I'm not too worried about the alcohol content because most of the time with baking and cooking, the alcohol cooks off.  I'm also wondering if I can re-use the leftover alcohol (maybe adding more) next year.


I have read that in the German Countryside they used to have a crock that they kept the leftover fruit in during the season.  Putting different kinds of fruit and berries in as they came in season during the ear and topping with some alcohol.  During the winter months they would break this out as a special treat.


6/11/12 Update..... Don't fill the jar too full because the fruit and brandy work and expand.  I had to take some of the mixture out and put in another jar.  Next time I will only fill the jar 3/4 full. 

Tuesday, May 29, 2012

Blackberries


The blackberries in the blackberry patch beside our pasture arw starting to ripen.  I have big plans for them.  I have waited a year to harvest these black beauties.  We had a few last year but they were about done when we moved in.  I thought I had another week or two until they would be ready but, surprise they are ripe.   After chores Monday morning we changed into our berry clothes, gathered our buckets and went out to do battle with the brambles in order to get to the juicy fruit.


If you have ever picked blackberries you know that in order to pick effectively you really need to put jeans, shoes, and a long sleeve shirt on. It was so warm on Monday that we attempted to pick in short sleeves.  We have battle wounds to show our foolishness.  While picking the silence was broken by victims being poked, scratched, and otherwise abused.  Not to mention Squeak, our barn cat deciding to help.  His idea of help was to hide inside the brambles and attack unsuspecting berry pickers, making them squeal with surprise.  While we were out there our four Lamancha bucklings found a cranny in the fence to squeeze through and join us. They would jump and run every time the dog came out of the bushes while hunting for a mouse to eat.  It was quite an interesting menagerie.


We picked about 7 pounds of berries, there are many more to ripen so I see a lot of berries in our future.  The family will want a shortcake first, then I can get down to business and make some jam.  I am also going to can some this year.   I have read that this is a really good way to store them for winter use.  My mom told me that her mother would can blackberries every year. 
I found a recipe that is lower in sugar and has natural pectin from apples in a book called "Preserving Food without Freezing or Canning"  I really like this book and the premise of preserving food without electricity usage and lower sugar. 


Blackberry Jam


2lbs Blackberries
2/3lb diced apples (tart like Pippin)
1 1/2 lb sugar
1/3- 1/2 cup lemon juice
1/2 c. ground Hazelnuts
canning jars and lids


Combine apples,blackberries, sugar, and lemon juice, and let sit overnight in a cool place.  Scald jars and lids well and let drain.  Bring blackberry mixture to a boil and cook on high  heat for 15 minutes adding hazelnuts after first ten minutes.

Fill jars to the rim with the hot jam and screw the lids on tightly.  Immediately turn the jars upside down.  If jars are properly full, very little air should remain at the top.  Store upside down in a cool, dark place.

I haven't tried this yet but am planning on it this year.

Tuesday, May 1, 2012

Strawberry Season


Lets talk about strawberries since they are in season  right now.  Everywhere that we have lived we try to have a strawberry patch.  We used to go pick around 50 -75 quarts of strawberries every year and put them up in various ways.  In the last few years we have stopped doing that and try to pick from our own patch or go without.  There are two reasons for this.  One, we know that our strawberries have not been sprayed with chemicals and two, it is easier to pick along and put them up through the season rather than the marathon 1-2 days we used to do.
This year we have a new strawberry patch and are only getting a handful of berries every few days.  These go into our morning smoothies or are eaten before we make it into the house.  So, I broke down and bought a few quarts of strawberries this year.  I added a couple of pictures of the processing, they look so beautiful.  I put them in the sink and soak them in cool water with a dollop of bleach for 10 minutes of so to take off some of the residues.  I rinse, de-hull, and cut up in a bowl.  From there they are processed into Jam or frozen in quart bags without sugar.   We also make shortcake and ice-cream with them.

It is funny how strawberries can bring back memories of past years.  My father's birthday is in mid June and where they live the strawberries are in season around his birthday.  We always had shortcake for his birthday.  I remember as a young girl helping my Mother pick strawberries in the fields around our house for shortcake for Dad's birthday.  You haven't lived until you have tasted wild Strawberry Shortcake with fresh, warm biscuits and whipped or clotted cream.  But I will warn you, it is much more labor intensive since the berries are so much smaller.  However, if you ever have a chance to make shortcake with wild strawberries, it is well worth it.

We are praying that the strawberry patch will produce much better next year.  In the meantime, we are planning on enjoying my moment of weakness.